A brush takes shape through a sequence of making and checking stages. Explore the process behind custom development.
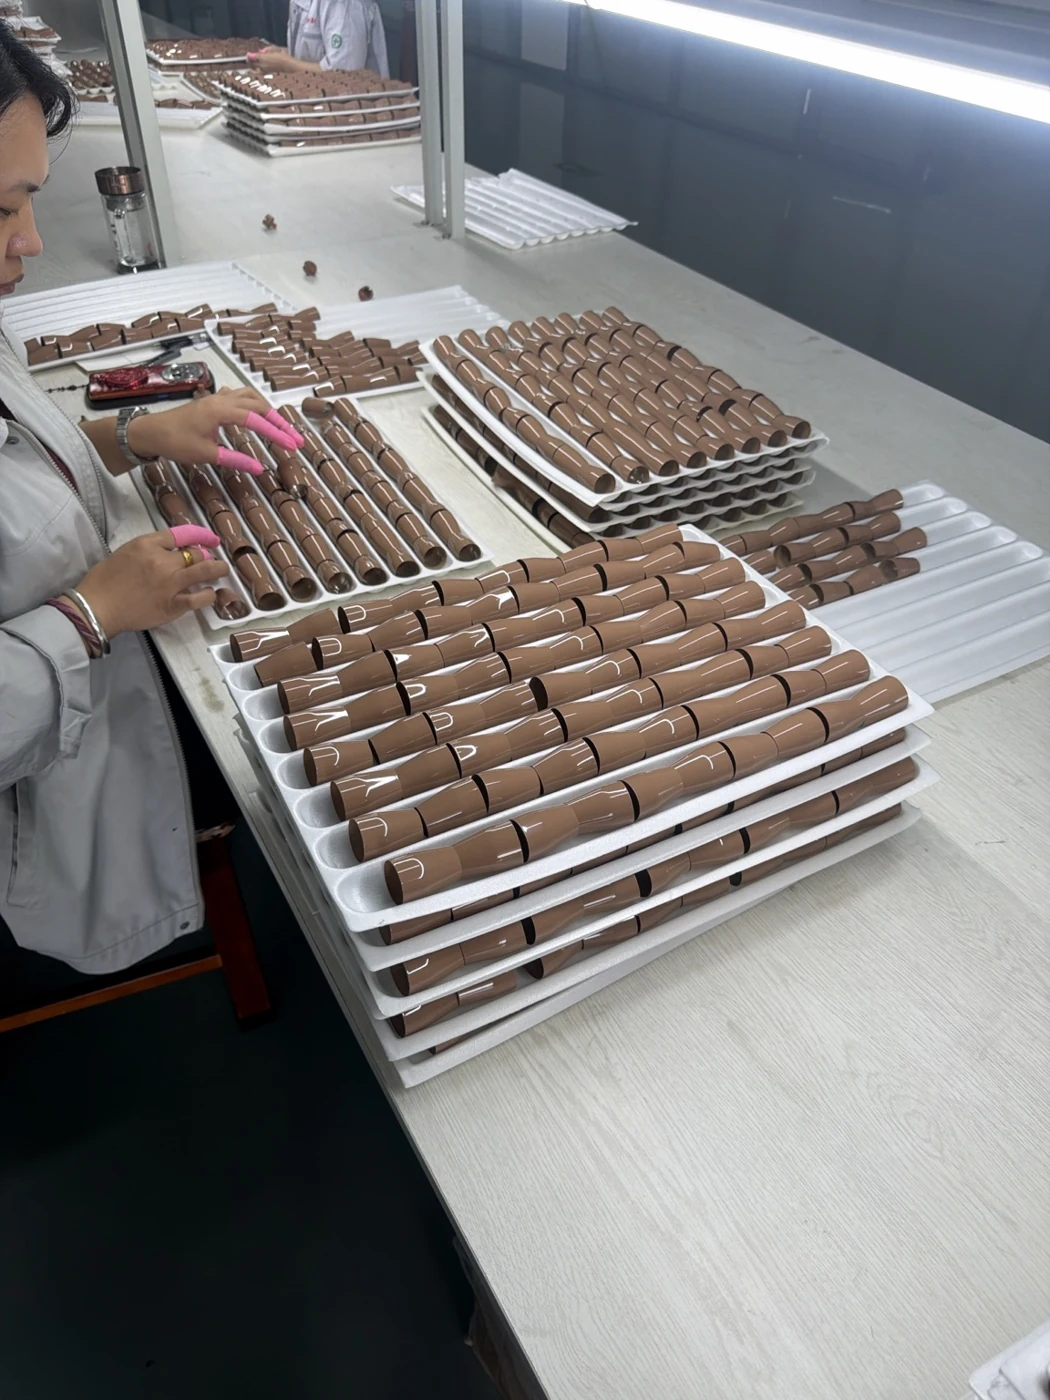
Ferrule components at the workbench · on-site photograph
A closer look
Small components. Many considered steps.
These photographs offer a view of the workbench and the making process. PRETTY brings the development brief, production details and sample review into one conversation.
Each brush begins with decisions about its bristles, ferrule and handle. The steps below show how components take shape through making, assembly and inspection.
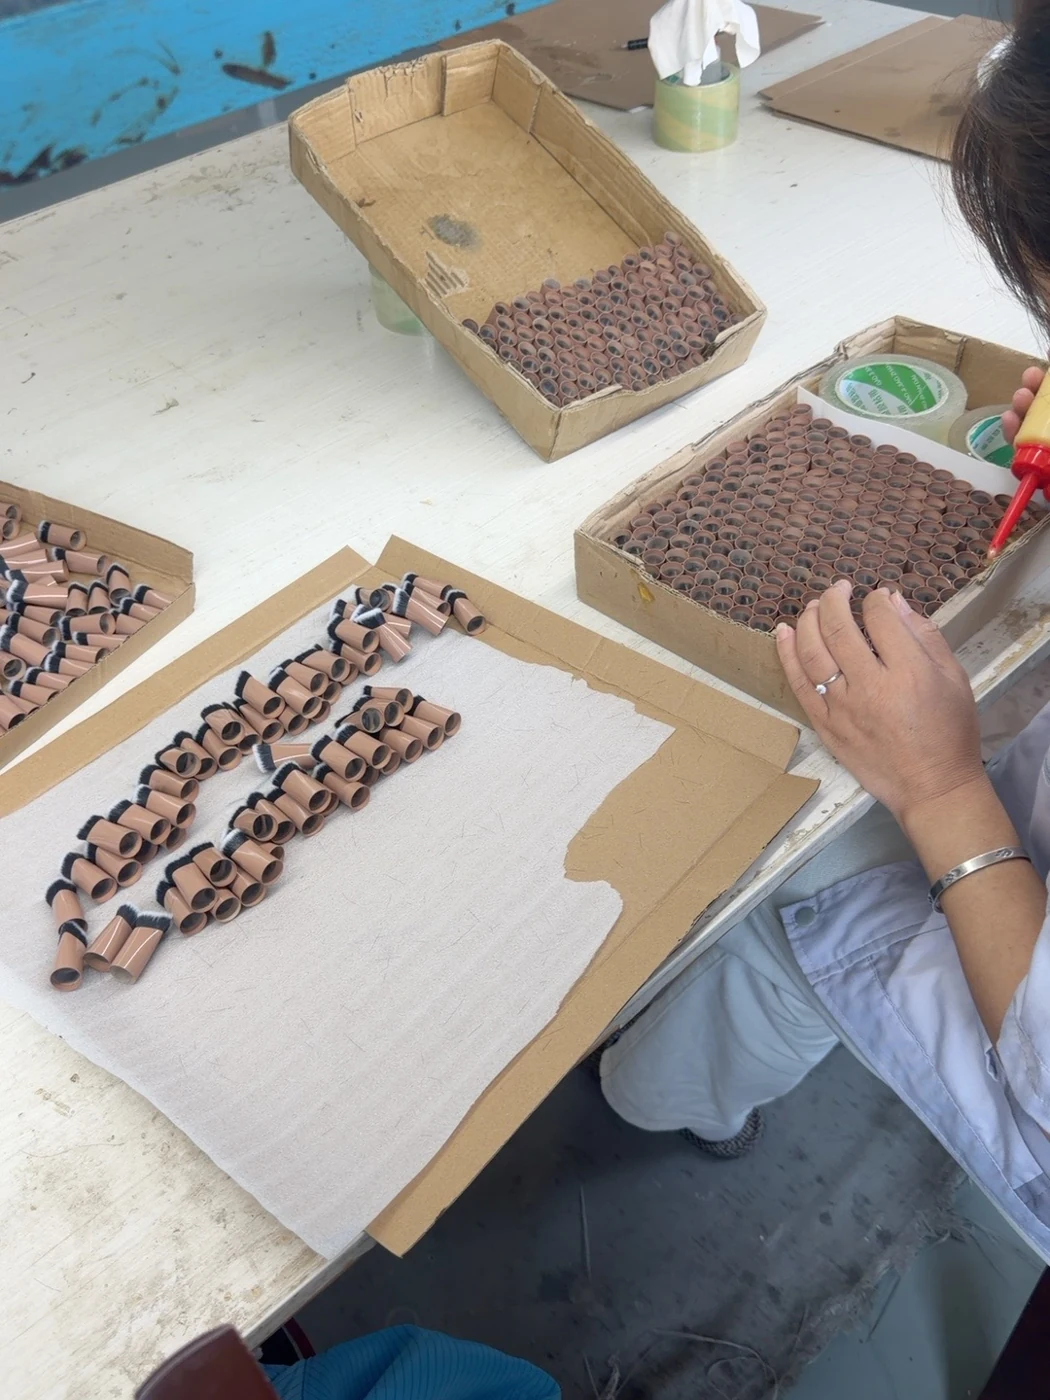
Adhesive is applied inside the brush-head assembly. Drying follows as a separate stage in the recorded process.
The selected materials and construction determine the assembly details to confirm for your project.
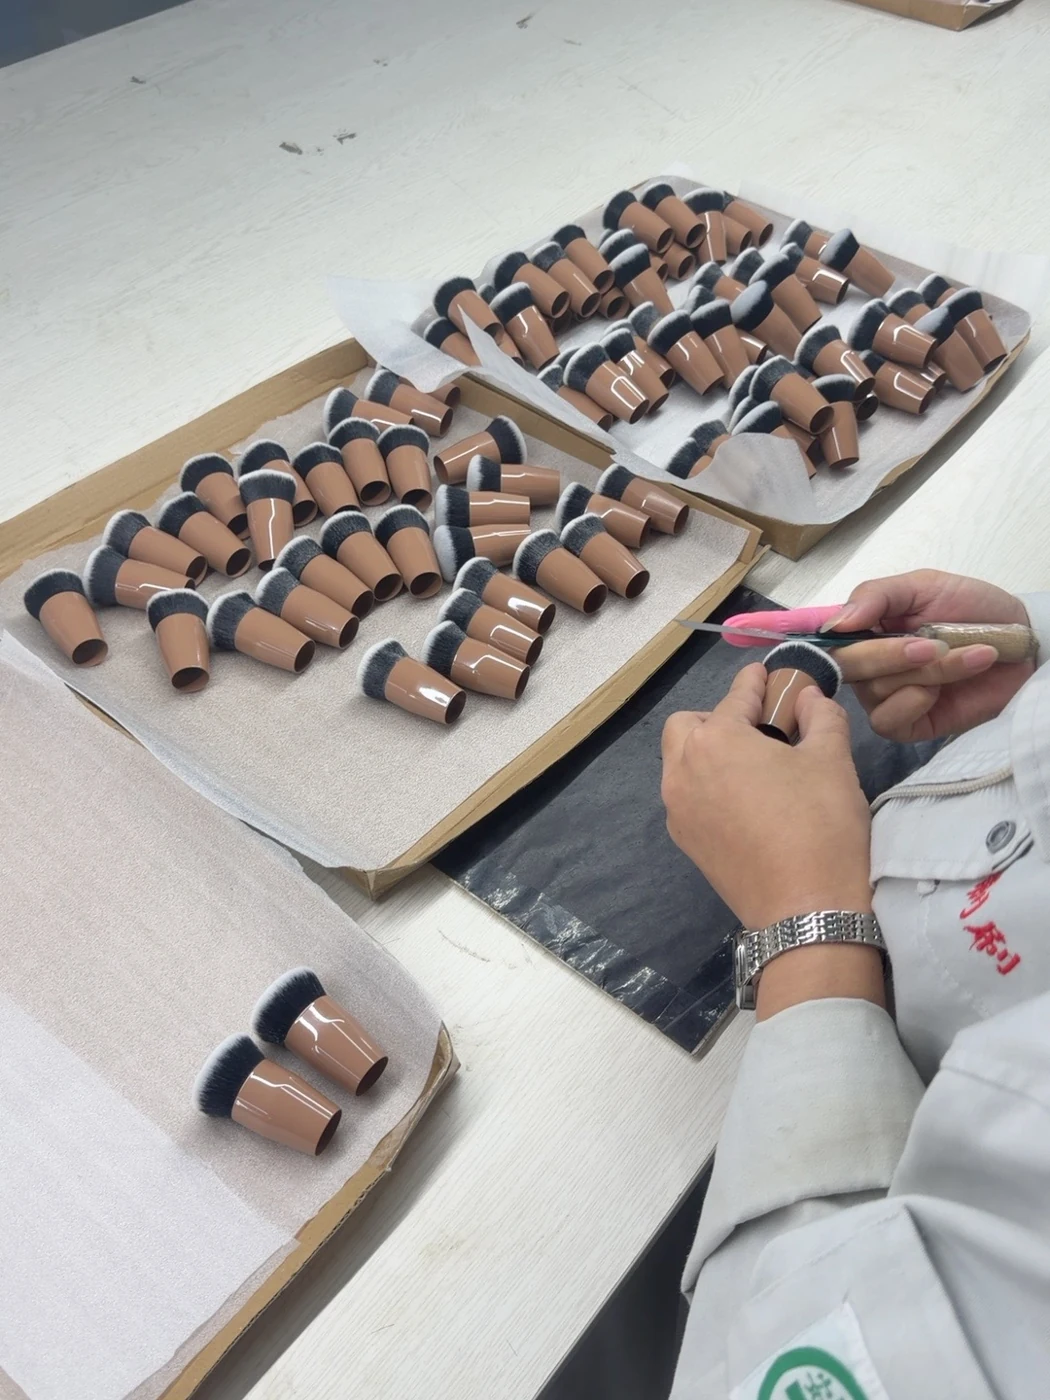
Head shaping · on-site photograph
View 02
Inside the making
Head shaping
The brush surface is shaped at the workbench. This is where the outline of the head becomes visible in the making process.
Use the sample review to discuss the head profile, proportions and the feel you want to achieve.
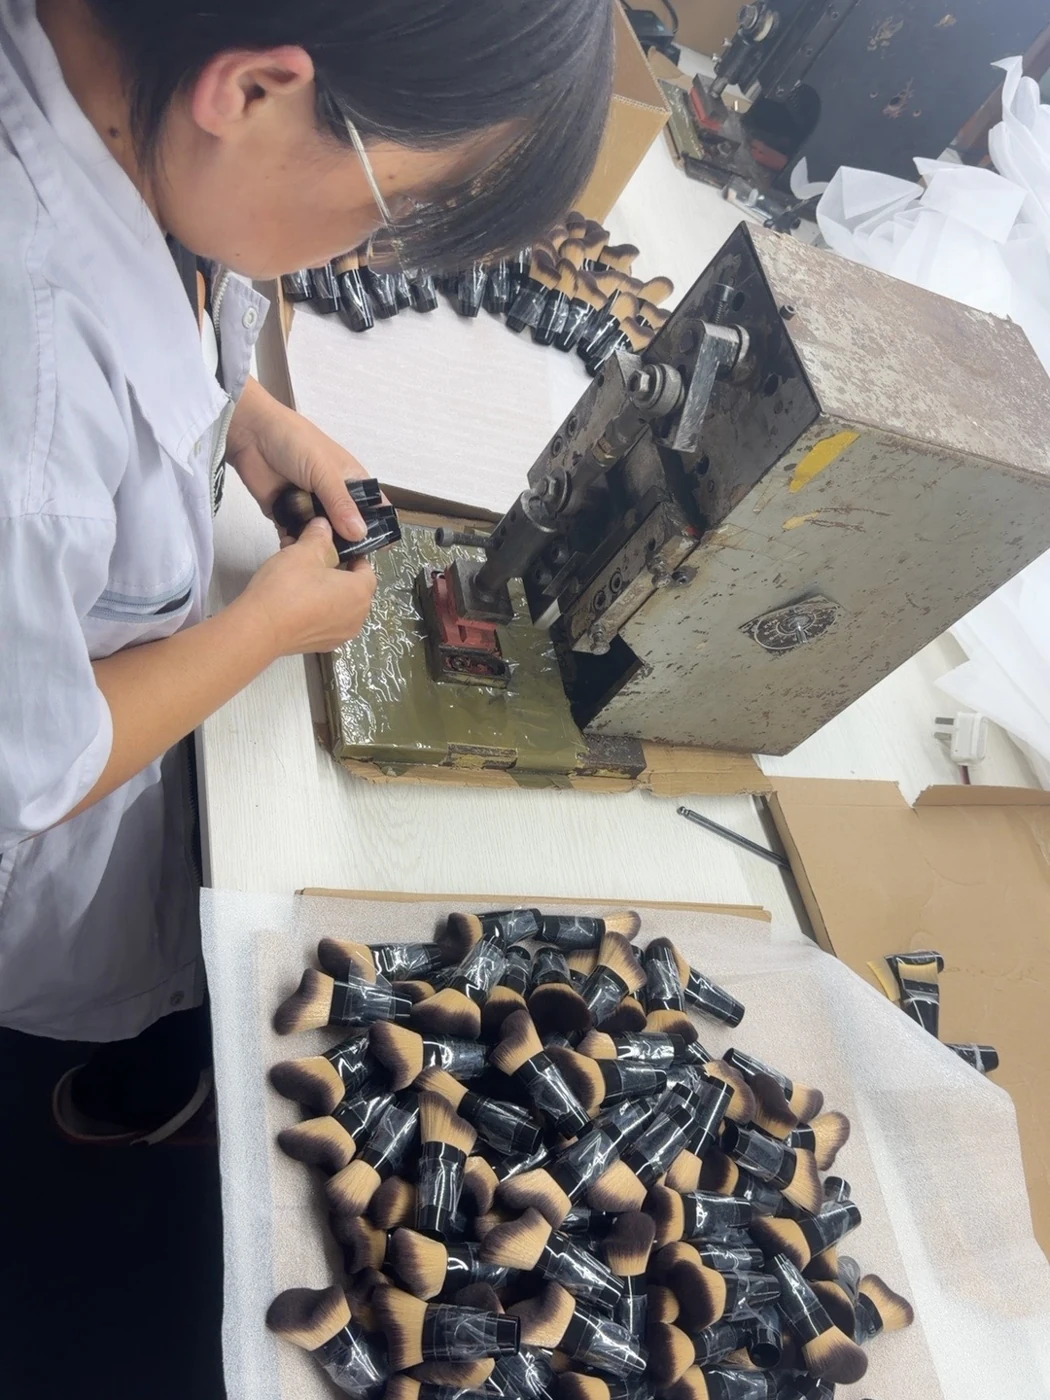
Ferrule crimping · on-site photograph
View 03
Inside the making
Ferrule crimping
The ferrule is worked with a crimping tool. The connection and construction details belong in the development specification.
A finished silhouette depends on the relationship between the head, ferrule and handle. Confirm the component details together.
Making & checking
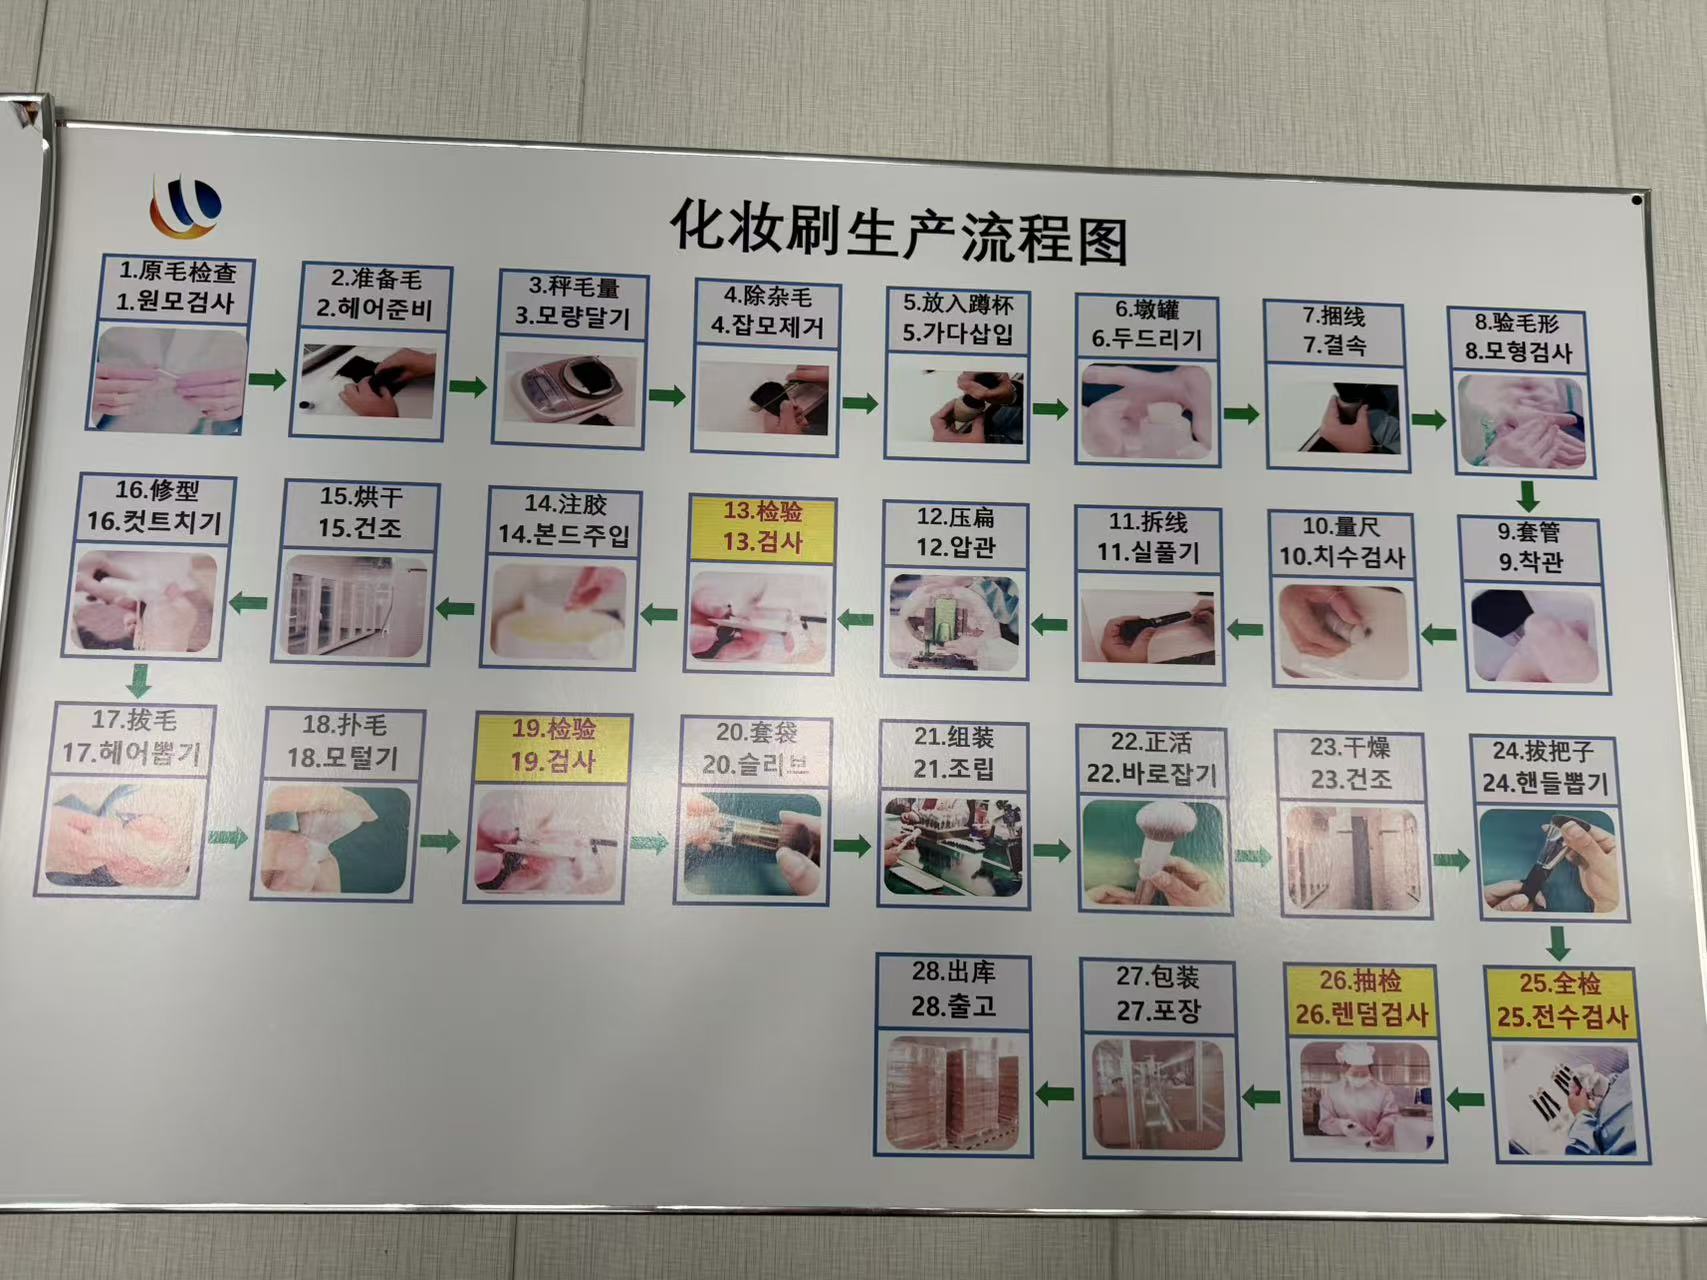
28 steps. One considered process.
Follow our bristle-brush production workflow, from incoming material to dispatch. Open each stage to see how the brush takes shape and where inspection enters the process.
01 · Steps 1—4
Material preparation
+
Which material and preparation requirements belong in the specification?
Incoming bristle inspectionInspection point
Check the incoming bristles against the material and sample requirements.
Bristle preparation
Prepare the bristles for the selected brush head.
Bristle weighing
Weigh the bristles for the intended bundle.
Removal of unwanted fibres
Remove unwanted fibres before forming the head.
02 · Steps 5—8
Head shaping
+
Does the profile match the intended application?
Place the bristles in a shaping cup
Place the prepared bundle into a shaping cup.
Tap the cup to shape the bristle bundle
Tap the cup to settle the bristles and form the profile.
Tying the bristle bundle
Tie the formed bundle for the next handling stage.
Bristle-profile inspectionInspection point
Check the formed bristle profile.
03 · Steps 9—15
Ferrule fitting and bonding
+
Are the dimensions and component fit agreed?
Ferrule fitting
Fit the prepared head into the ferrule.
Dimensional checkInspection point
Check the dimensions at this stage of assembly.
Removing the temporary tie
Remove the temporary thread used to hold the bundle.
Ferrule pressing
Press the ferrule to the required profile for the construction.
Apply a protective sleeve before subsequent handling.
05 · Steps 21—24
Handle assembly
+
How should alignment and connections be reviewed?
Handle assembly
Assemble the handle and prepared head components.
Alignment adjustment after assembly
Adjust alignment after assembly and before drying.
Drying
Dry the handle assembly under the agreed bonding conditions.
Handle pull check after drying
The board shows pulling the handle after drying. The connection-check purpose is interpreted from its place in the sequence; force, duration and acceptance criteria remain project-specific.
06 · Steps 25—28
Final review, packing and dispatch
+
What is inspected, how is the lot sampled, and how is the order packed?
Full inspectionInspection point
The board identifies a full-inspection stage. Agree which visual and assembly checks are included for each item.
Sampling inspectionInspection point
The board identifies a sampling stage. Agree the lot, selection method, checks and acceptance rules.
Packing
Pack the products and check the agreed set contents, protection and labelling.
Dispatch
Release the packed goods for dispatch against the order and packing documents.
View the original manufacturing flow boardThe factory's original production flow board. English explanations follow its numbering. Non-bristle tools can require a different process.
Use this workflow to discuss your production and inspection requirements. Connection-check methods, test forces and acceptance criteria are agreed with your product specification.
Your product. Your acceptance criteria.
Agree what a good sample means.
Use these common review topics to build the checks for your order. The method, coverage and acceptance criteria are recorded with your agreed specification.
Review topic
What to look at
Agree for your project
Material & incoming components
Identity documents, visible contamination, colour and component condition.
Material identity, reference sample, lot and incoming-inspection scope. Source ↗
Dimensions & profile
Overall length, exposed head length, width and shape against the drawing and approved sample.
Measurement points, how flexible bristles are held, tolerances and frequency. Source ↗
Loose fibres & finishing
Unwanted hairs, loose fibres and profile after defined handling or use.
Handling steps, cycles, collection method and acceptance criteria. Source ↗
Assembly & connection
Alignment, gaps, visible adhesive and looseness; strength tests where required.
Which joint, loading direction, force, duration, fixture and whether testing is destructive. Source ↗
Finish & logo
Colour, surface condition, mark completeness, position and orientation.
Lighting, comparison sample, defect examples and any separate wear test. Source ↗
Set contents & packaging
Brush and accessory counts, head protection, labels, packing and carton identity.
Approved set list, packaging sample and checks during or after packing. Source ↗
Application & care
Performance with the intended formula and changes after the agreed cleaning routine.
Formula, use and care conditions, review cycles and acceptable changes. Source ↗
Full inspection
Define the visual and assembly checks applied to every item at step 25. A full visual check does not mean that every item undergoes every functional or destructive test.
Sampling inspection
Define the lot, random selection, defect categories and acceptance rules. ISO 2859-1:2026 is one framework to discuss where appropriate; no AQL is assumed for your order.
Packing & release
The board places sampling before packing. Check packaging and set completeness during steps 27–28, or agree a separate review of packed goods.
The checklist uses public manufacturing references and NIST’s explanation of acceptance sampling. These are proposed review topics, not a record of tests already passed by PRETTY products.
Review materials, head shape and dimensions during development, with in-process and final checks included in the making sequence. Agree the methods and acceptance criteria for your order before production.
01
Steps 1, 8 and 10
Material, shape and dimensions
Begin with incoming bristles, head shape and dimensions. Keep the approved material, profile and measurement points with your product specification.
02
Steps 13 and 19
Reviews during making
Check the assembly after ferrule forming and review the head again after finishing. Agree how your sample will be checked for shape, loose fibres, connections and appearance.
03
Steps 25 and 26
Full and sampling inspection
The making sequence includes full and sampling inspection before packing. Define the checks for every item, the checks made on a sample and the acceptance rules for your order.
Let’s create your next brush.
Share an idea, a drawing or the brushes you have selected. We will work through the specification and paid sample for your brand.