
What should a beauty brand do if a makeup brush sample sheds or leaves streaks?
Identify the sample revision and document the observation under repeatable conditions. For shedding, retain the affected sample and agree the supplier’s investigation and checks. For streaks, compare the same formula, amount and motion. Review an identified revision before approval; appearance alone cannot establish the cause or a pass limit.
| Observation | What to record first | What needs confirmation |
|---|---|---|
| Loose fibres or shedding | Sample revision; when fibres appeared; the agreed handling or care procedure; photos and affected units. | Whether fibres are loose residue or continue to release, and what inspection or test method the supplier proposes. |
| Streaks during application | Formula, amount, application motion, sample condition and a photograph of the result. | Whether the revised construction improves the intended result under comparable conditions. |
| Ferrule or handle movement | Which connection moves, the observed gap and how the issue was found. | Assembly review and a separately agreed strength test if required. |
| Head deformed after packing | Packing version, insertion direction, storage condition and shape on removal. | Clearance, protection and condition after the agreed recovery or care procedure. |
Describe the observation before diagnosing the cause.
“This brush sheds” or “the foundation looks streaky” identifies a concern, but not the cause. Assign the sample a code and revision, record how it was used and retain the affected item. Say whether the observation occurred on first unpacking, during application, after an agreed care procedure or after storage. Do not infer the fibre, adhesive or assembly fault from a photograph alone. This guide is a proposed review workflow, not a PRETTY defect-rate report.
For loose fibres, keep the sample and review conditions.
Record the affected head, the number of units reviewed, the loose fibres observed and the handling steps. Ask the supplier to examine the retained sample and explain the proposed check and corrective action. Keep any strength testing separate from ordinary visual inspection: the method, equipment, conditioning and acceptance criteria must be agreed. A claim such as “zero shedding” needs a defined basis; this page does not establish a universal acceptable count or pull force.
For streaks, compare one variable at a time.
Use the same intended formula, amount and application motion when comparing the original and revised sample. Record head condition and the surface used for the comparison. BK07 and BK09 offer different recorded starting dimensions, but those dimensions do not prove either brush gives a better finish. Ask for a clearly identified revision and write down what changed. If both the formula and brush change together, the result will not isolate what produced the difference.
For loose connections, separate the affected components.
Identify whether movement is between the handle and ferrule or elsewhere in the assembly. Record any visible gap and retain the complete tool. Stop using a sample with a loose assembly or exposed sharp edge until the issue has been reviewed. Ask for the supplier’s examination and the agreed recheck of the revision. Do not prescribe an adhesive or a curing condition from appearance alone, and do not assume a successful hand check replaces a specified strength test.
For shape or packing issues, inspect the complete presentation.
Review the brush inside the proposed pouch, sleeve, tray or box. Note whether bristles touch a zip, wall or neighbouring tool, and whether insertion or removal catches either head. Dual-ended tools need protection at both ends. If the head size, cap or insert changes, repeat the packing review using that revision. A photograph of an empty case does not demonstrate fit, and a visibly recovered shape does not by itself establish performance after storage.
Send a revision brief with a clear retest decision.
Give PRETTY the product code, sample version, intended formula or packing version, observations, annotated photographs and the result you want to improve. Ask which component will change and how the revision will be checked. Keep accepted details separate so the revised sample does not silently change colour, logo, balance or dimensions that were already approved. Use the sample approval worksheet to mark each item accepted, revision required or not yet checked.
Agree the production check after the sample is resolved.
A satisfactory revised sample is the reference for the agreed order; it is not evidence that every production unit has been inspected. PRETTY’s 28-step process identifies shaping, assembly, inspection and packing stages. Use that sequence to discuss where the relevant checks belong, what is checked on every unit, which reviews use selected samples and how nonconforming units are handled. Record the actual order-specific method and acceptance criteria before production.
Put the idea into a brief
What should your brush do?
Bring your formula, customer context and preferred feel. We will discuss the brush, materials and paid sample together.
Add these checks to your sample brief →Explore relevant brushesApply this to your product brief.
These foundation references have different marked dimensions. Use them to specify the comparison, not to claim one has passed a shedding or streak-free performance test.
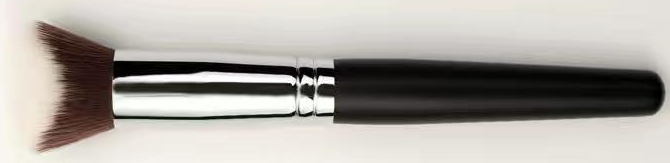
BK07 · Flat foundation brush
35 mm head width · 27 mm exposed bristles
Overall: 140 mm

BK09 · Paddle foundation brush
23 mm head width · 30 mm exposed bristles
Overall: 180 mm
